General Tips for Logic Pro X
Most shortcuts a had for Logic Pro 9 was saved and implemented when I updated to Logic Pro X (long ago by now). I have kept a copy of Logic 9 because of the 32 bit plug-in support but must admit that I very seldom open it any more.
Get note length in milliseconds
This is a great measurement tool when working with attack or release times in compressors. To access note length in milliseconds based on the song tempo, click on the Delay settings under More in the info side pane to access this time list.
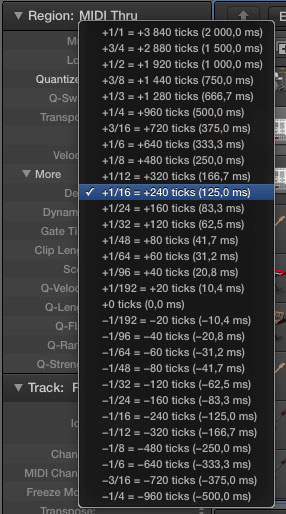
(This works for both audio and MIDI tracks)
Drum replacement
Works with snare and kick. Select an audio recording and go to Track in the menu and select "Replace or Double Drum Track..."
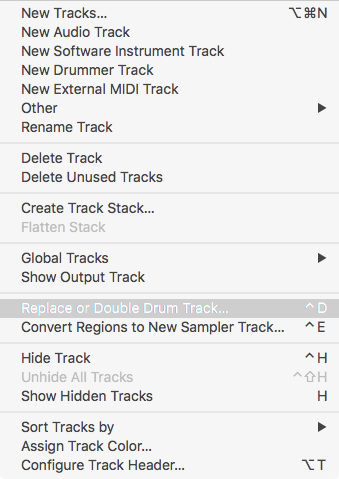
Choose what to replace, snare or kick
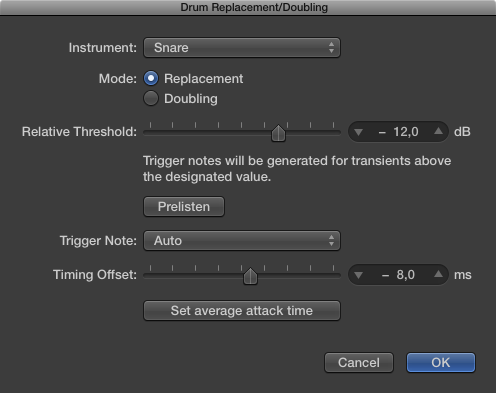
Click on Prelisten and select sample in the side pane to the left
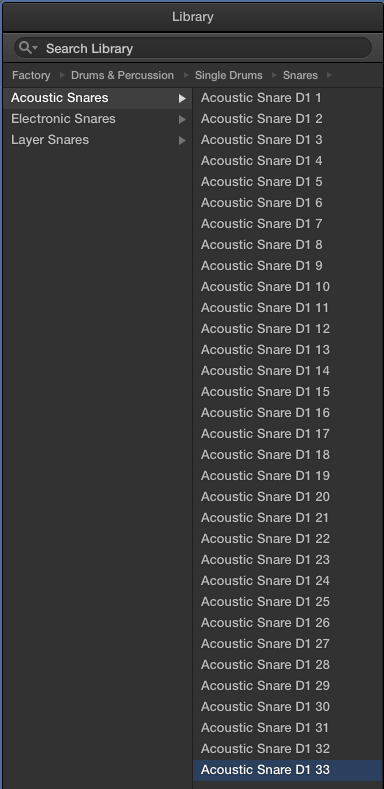
...
Bounce mono to mono
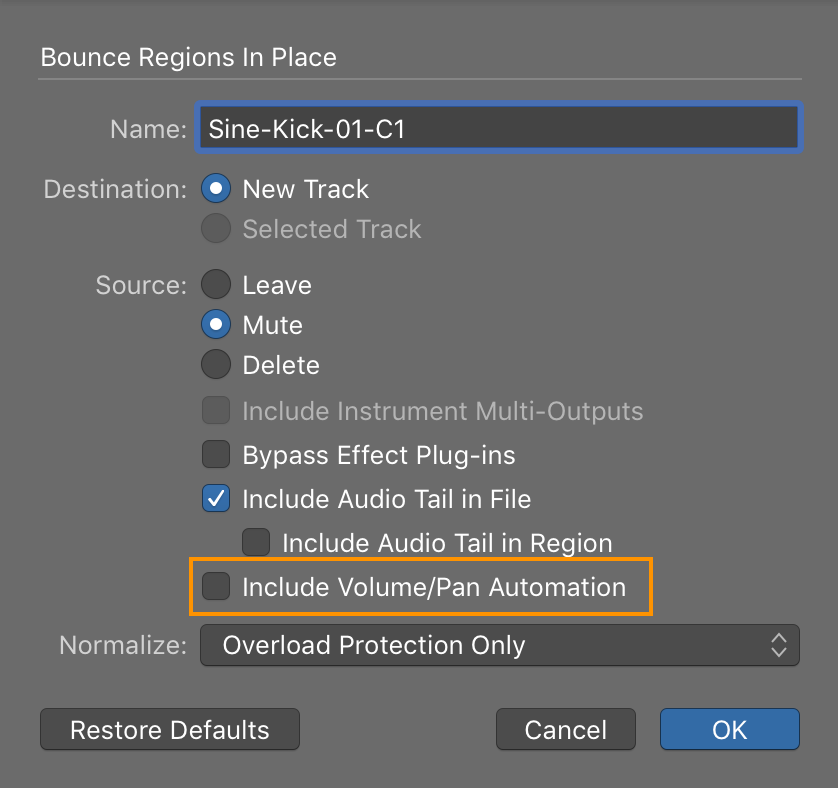
When bounce in place mono becomes stereo, how to avoid.
Set output to mono does not really help. Instead make sure not to include "Input monitoring only for focused track, and record-enabled tracks" when bouncing the track.
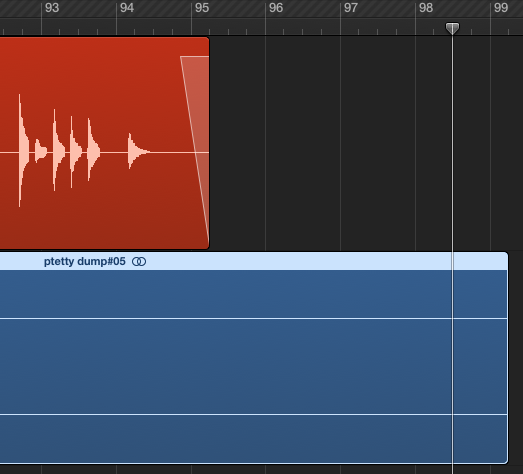
Missing Waveform Problem
Can't do much editing if you don't see the waveform. This is/was probably a bug that hopefully has been fixed.
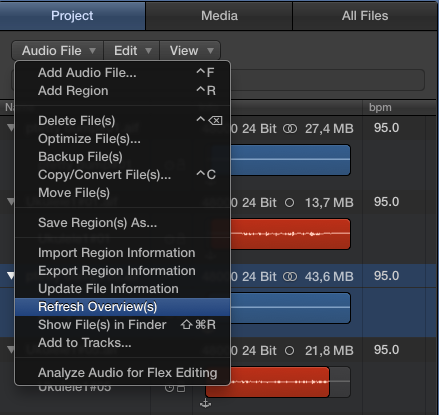
Go to the Media bin and select files with missing waveforms, go to the "Audio File" tab and select "Refresh Overview(s)"
Capture Recording - MIDI and Audio
This is a very useful feature that enables you capture a performance (both audio and MIDI) if you forgot to press the record button when you where jamming away. One thing to remember is that you can click the red button with the white circle around it after you have pressed stop for MIDI, but for audio you need to record a few seconds of audio before you press stop. After that you can drag out the recording.
(I might put an image here to show how it works)
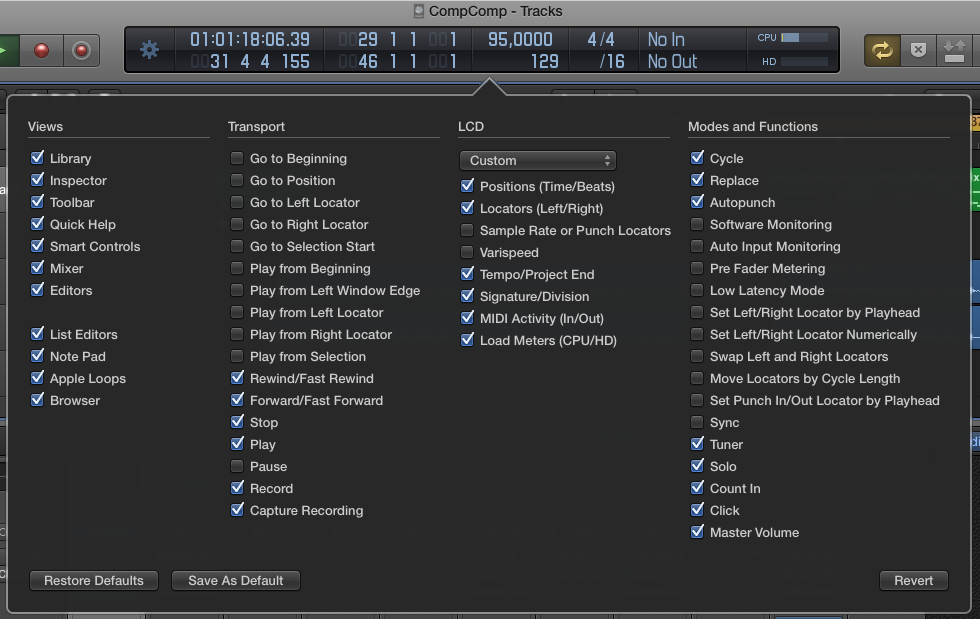
Under "Customize Controlbar and Display" (right click next to the transport) there is a feature called "Capture Recording" under the Transport section. It enables you to capture what you just played without pressing the Record button. When you are done playing, press the red button with a circle around it.
In order to make this work with audio you have to enable "Allow Quick Punch-In" under the Record menu.
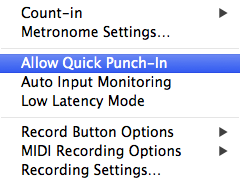
Please remember to press the Record button (not the same as the one for Capture MIDI) before stopping playback. It is enough with a few seconds. After that you can press stop and then drag out the audio back in time.
- Select and record enable [R]
- Press Play (space bar) and play something through the microphone
- Press Record Button for a few seconds
- Press Stop
- Drag out the region
MIDI Chase
Under Project Settings, check Notes Sustained and Notes under Chase on Cycle Jump.
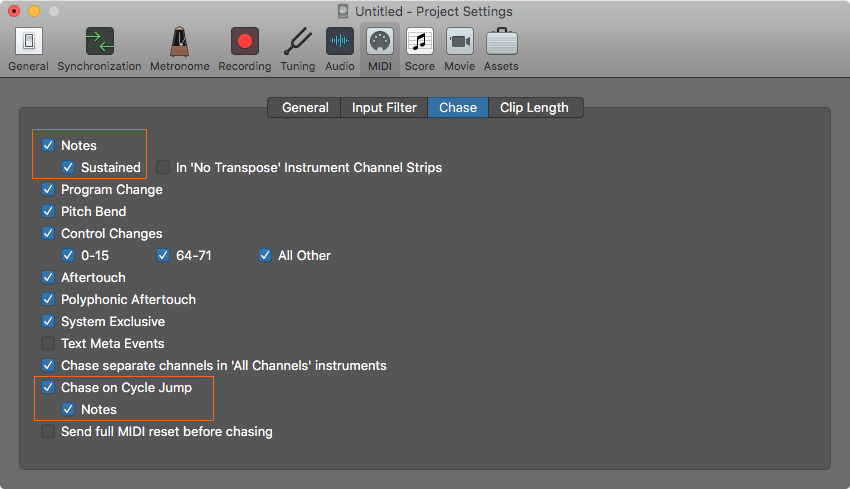
This enables a MIDI note to be played even if the playhead did not catch the beginning of the note in the Piano Roll.
Lock imported OMF Audio to SMPTE Position
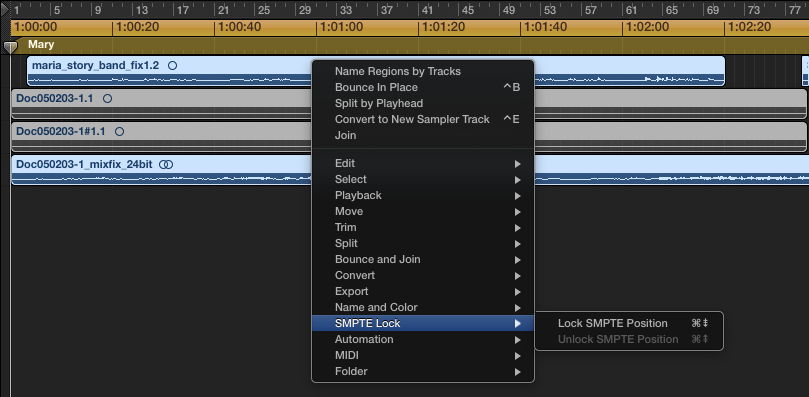
This can be very useful when changing tempo but you do not want to affect the timing of imported OMF files. Select the files you do not want to move or change, right click an choose "Lock SMPTE Position"
Channel EQ
The Channel EQ got a really nice face lift in Logic X (I hope they would re-design all their plug-ins)
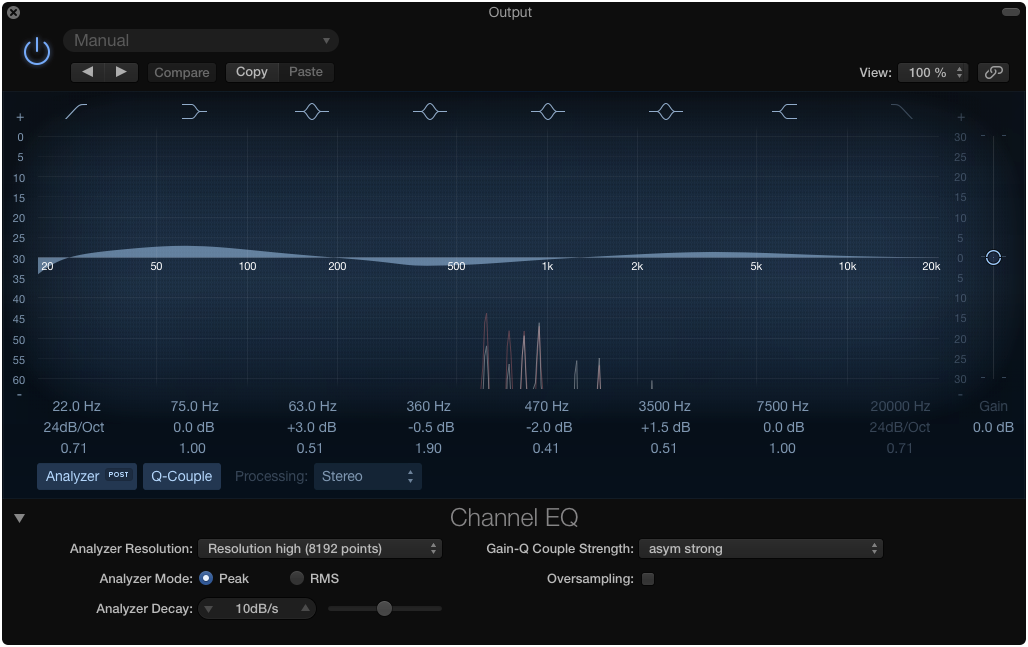
Have you ever noticed how easily and quickly your audio gets thin when you start applying EQ. Most EQ changes the phase of the audio signal. Try using Linear Phase EQ
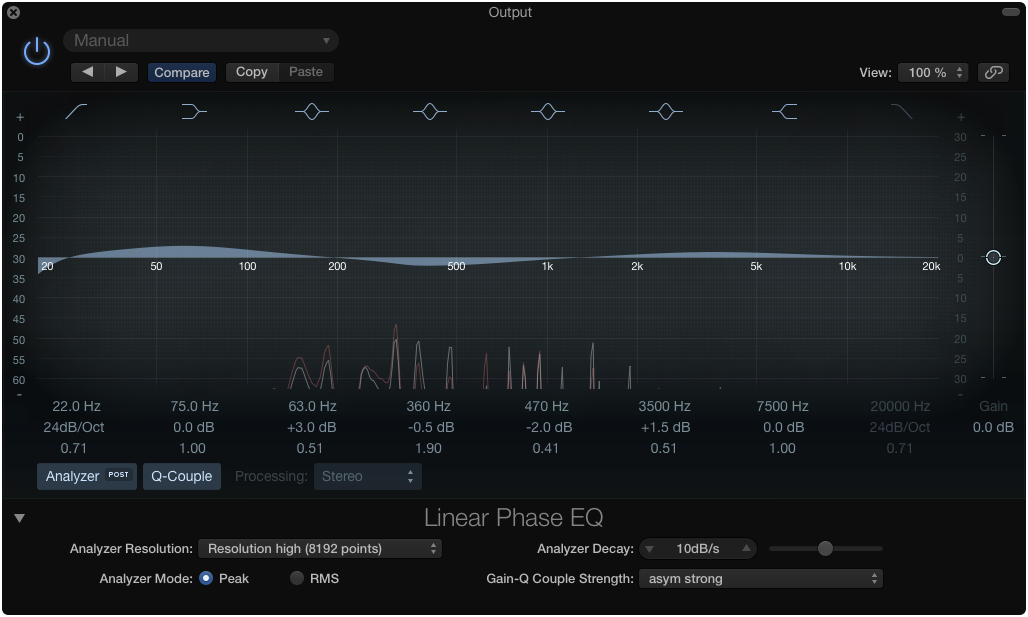
The nice thing about this is that all settings remains the same when you switch EQ. Please note, Linear Phase EQ is only useful in mastering and mixing and not for tracking because it introduces latency.
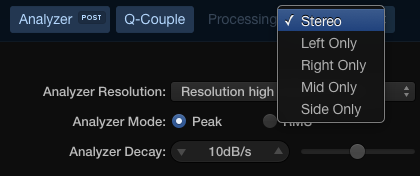
Mid-Side Processing with Channel EQ
Better accuracy with Channel EQ
By checking the oversampling check-box I have noticed an improvement in sound quality with Channel EQ. The manual states that it becomes more accurate. In my mind, it just sounds better.

Compressor
The compressor GUI got updated in Logic Pro 10.1.1, read the whole article about compression here
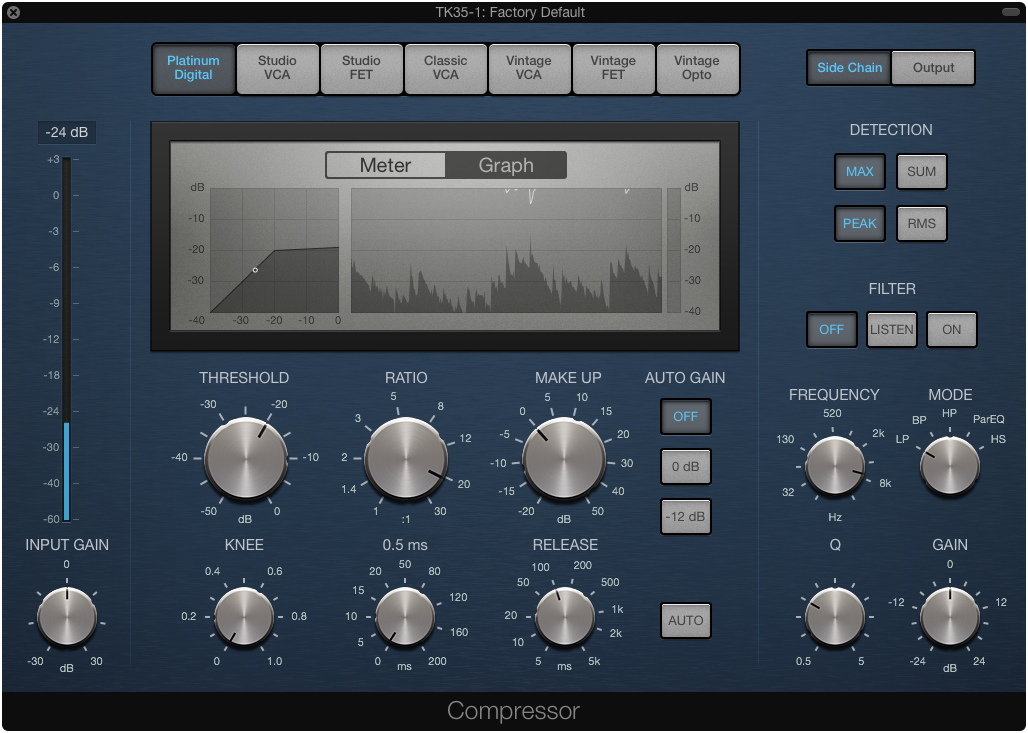
The old Compressor
Hidden features in Logic Pro X old compressor (only for versions older than 10.1.1). By clicking the little triangle at the bottom you get access to very useful features like targeting a specific frequency range, parallel compression and distortion.
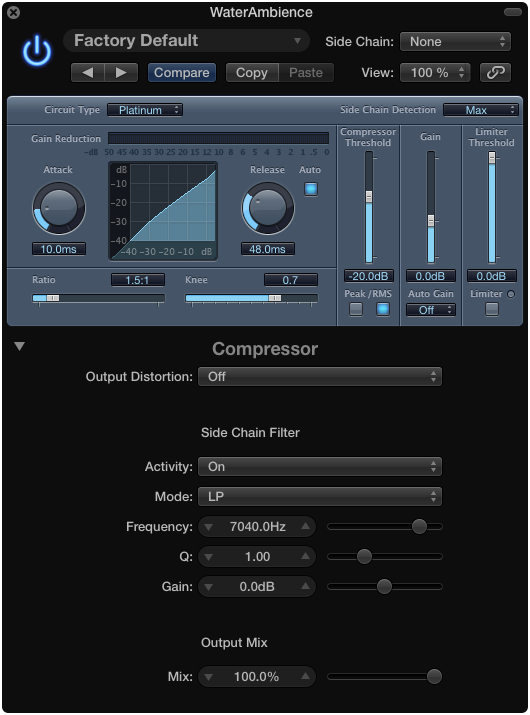
Usage: First, set Activity to "Listen" to find the frequency and then set it to "On".

"Output Mix" enables the Compressor to "On".
Compressor Emulations
It would be nice if Apple would tell us more what compressors they are emulating but here is some ideas.
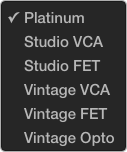
www.askaudiomag.com/articles/exploring-logic-pro-xs-compressor-circuit-types
Different Delays
Tape Emulation
The Tape Delay plug-in can be used to simulate tape saturation.
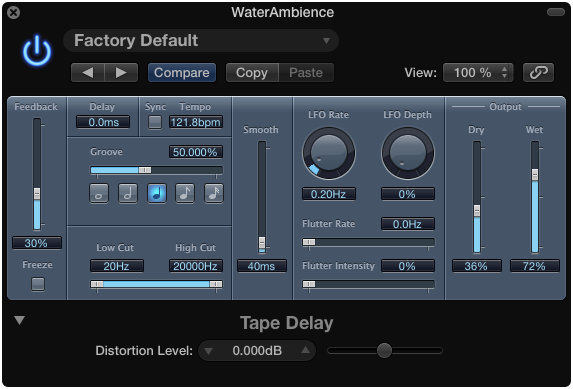
Turn off "Sync" and set "Delay" time to zero.
Reverb
Sound Designer
Drag and drop IR (impulse response) files (wav or sdir) directly in SD window
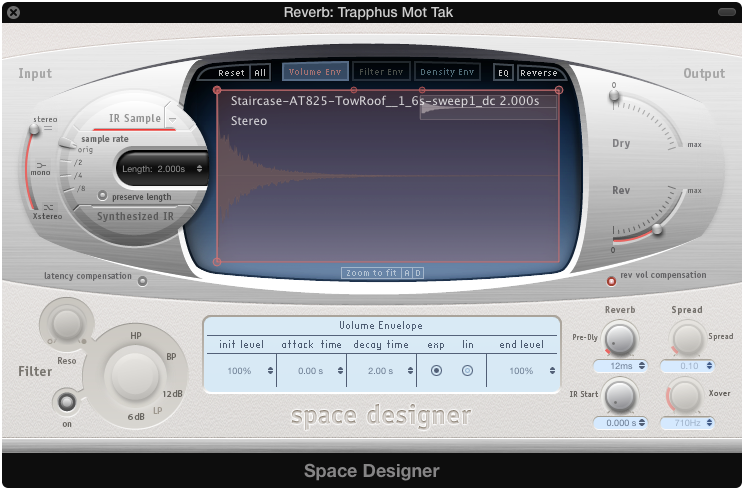
To deconvolve recorded sweep, change mode from "Editor" to "Controls" (parametric mode), look for "Decode IR"
Switch mode to "Editor"
![]()
Look for "Decode IR"
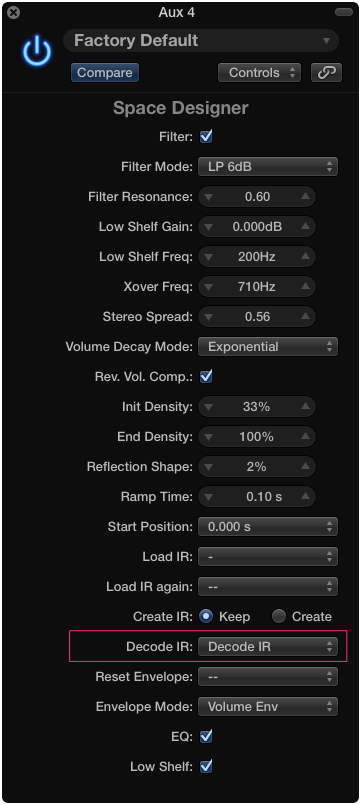
Work flow - Deconvolve IR
Deconvolve directly in Space Designer
- Create a sine sweep 20-20000 Hz -0.1 dB, trim and bounce
- Import sweep to time line, set output to device input and record the returning signal
- Save recording and sweep as two files with the same length
- Open an instance of Space Designer (in Editor mode) and choose Decode IR
- Locate the two files created when asked
Read more about it in creating your own IR
Impulse Response Utility
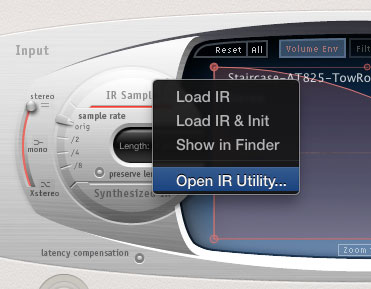
A great program for generating impulse response files "IR Utility" is located (hidden) under the little triangle next to IR Sample
Create a new Stereo Project
Set inputs and check levels with "Test Tone" (be mindful of your ears and gears)
Estimate how long the reverb tail will be, preferably longer than you need, can be trimmed later. Press the record buttons [R] and record the sweep
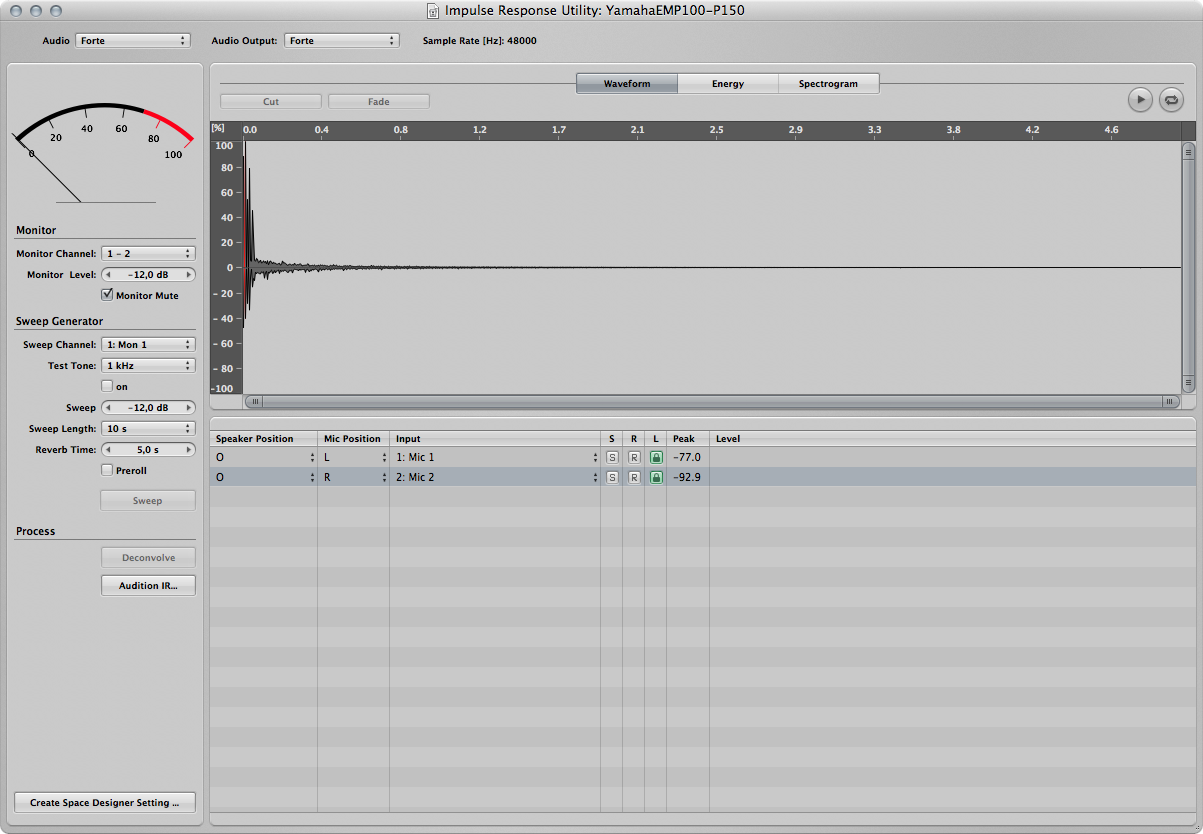
Deconvolve, listen, trim and save as preset
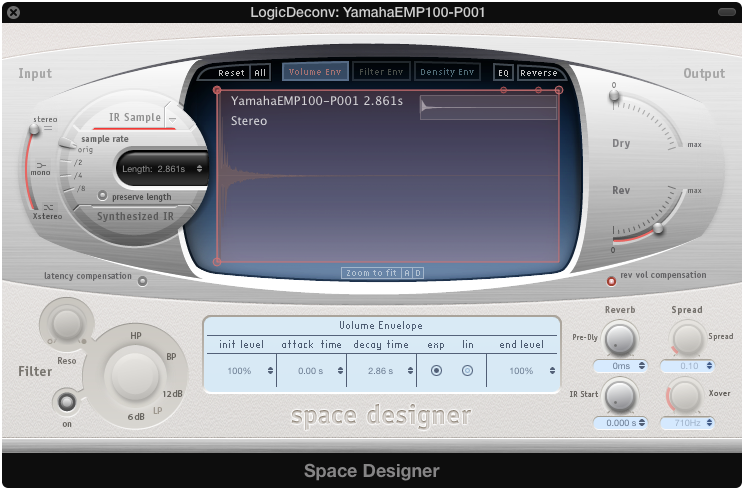
Read more about creating your own IR
Enable ReWire
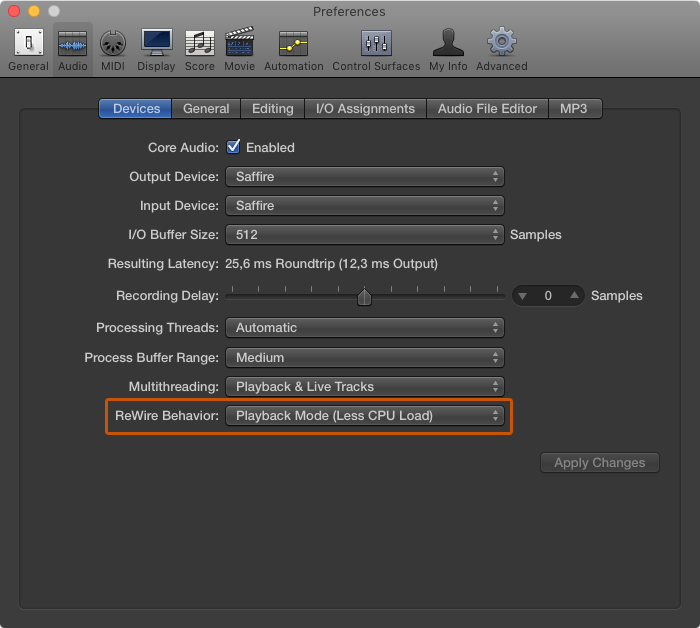
To enable ReWire you first have to go to preferences and change the ReWire behavior
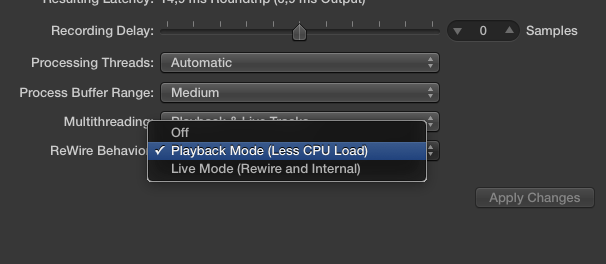
Default is set to off.
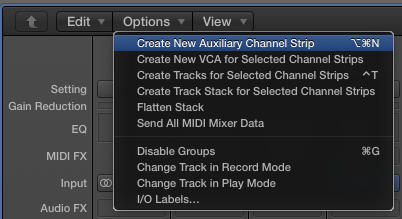
Next, go to the channel mixer and create a new Aux track
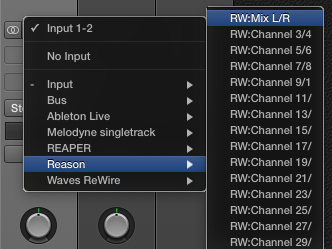
Under input, select whatever you want to ReWire
CPU Usage
Try spreading plug-ins over several channels and auxes instead of putting everything in one strip. This is how Logic allocates CPU threads usage. For instance, do not put all instruments in one Kontakt 5. It is better to use multiple channel strips to reduce CPU load.
Issues – CPU & GPU on older Macs
GPU and fan noise
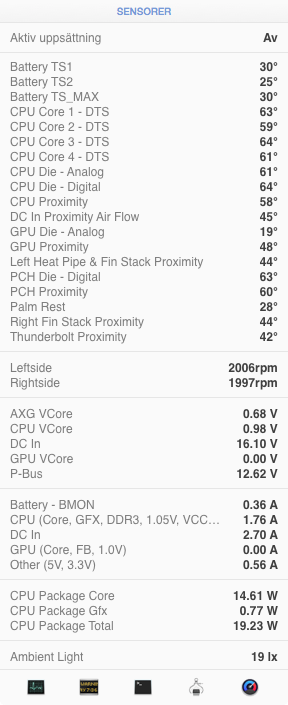
My main workstation has been a MacBook Pro 17-inch late 2011. Lately the computer fans are spinning so fast and becomes so loud that it makes it impossible to record with the computer close to a microphone. I did not have this issue before. The reason is that many plugins now utilizes the processing power of the GPU. The problem with this in my MacBook Pro is that the GPU and the CPU are located very close to each other on the mother board. When the graphic acceleration kicks in it becomes very hot in this area, sometimes up to 95°C.
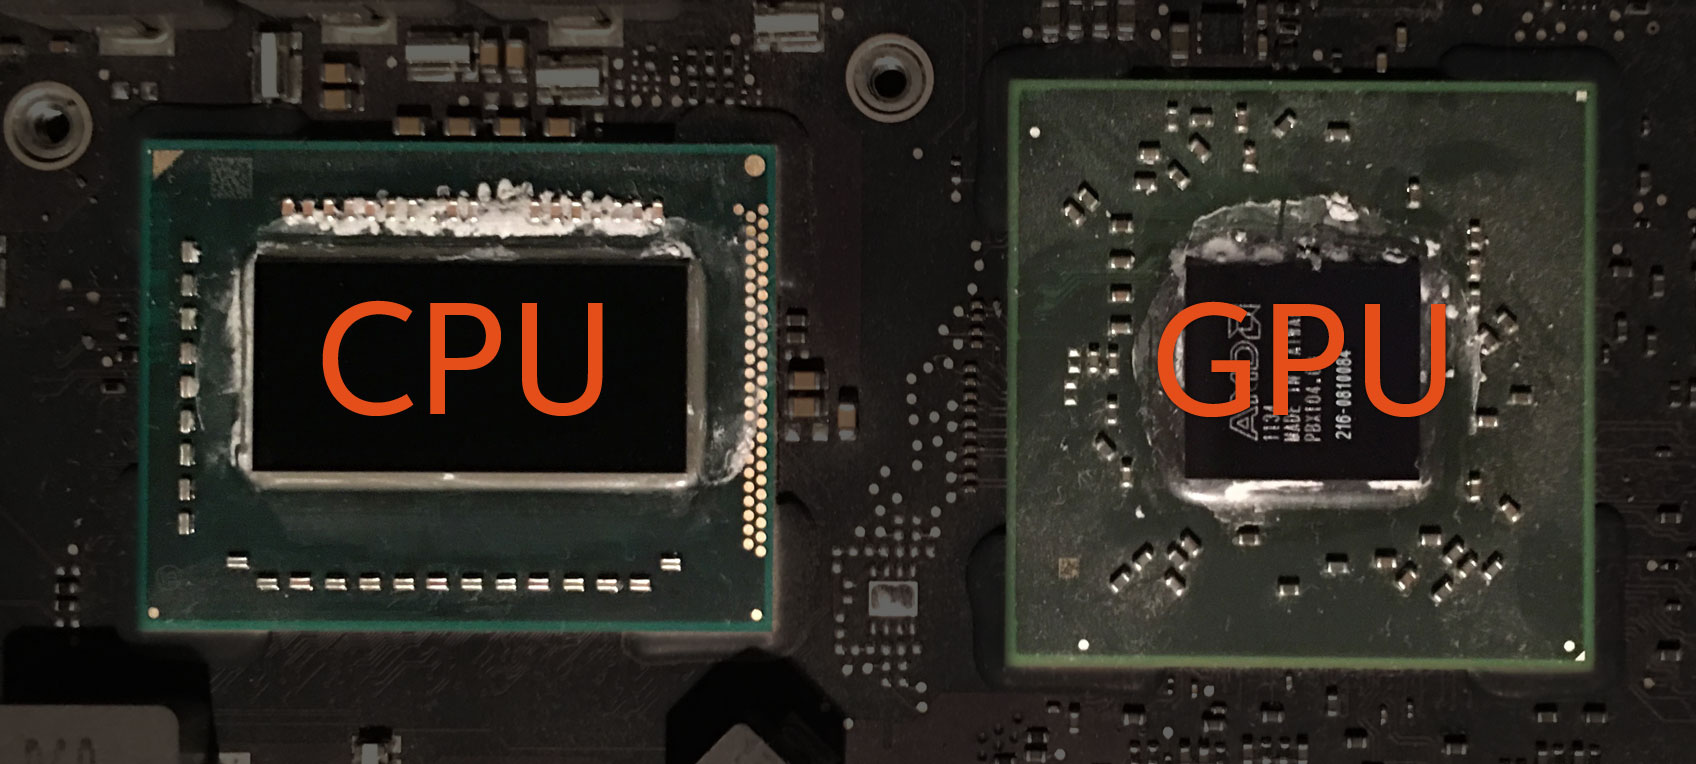
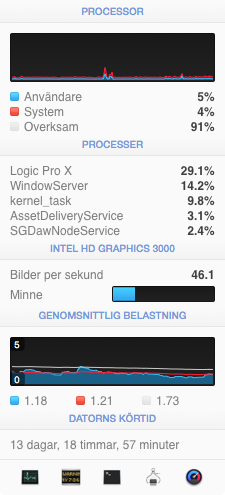
The solution is to make a very clean session without any plugins that utilizes the accelerated GPU (many plugins do). Below is an example of a 96 kHz session with minimal amount of plugins.
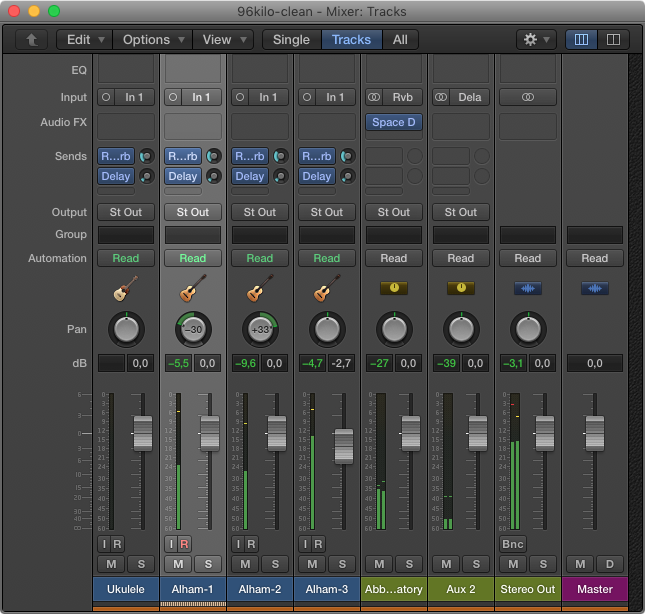
CPU load
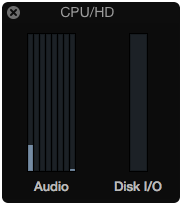
CPU and GPU load. Notice that the system uses the internal Intel HD instead of the AMD chip
Sensors. Even though the fans are spinning they are barley audible
...
Tips and Links
Resources
If you want to learn more about Logic Pro, go look for sflogicninja (David Earl). He is, in my opinion, the best human resource, expert and tutor on the web.
www.youtube.com/user/SFLogicNinja
or go look for his videos at Pyramind:
www.youtube.com/user/Pyratube
|•|